Workshop: Basic Arduino Square-Wave Synth
16Nov10
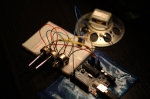
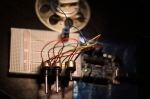

I was recently giving a workshop in collaboration with STEIM and The Patching Zone at the CKC in Zoutermeer for their new Digital Arts Lab. The subjects to cover were Processing, Arduino, and basic circuit building – with some people who had very limited (or none at all) experience of programming or electronics, and all in two days! The workshop participants caught on to the logic of coding and building circuit very quickly, and with great enthusiasm. By the end of the second day (and despite some technical difficulties), we had built a number of arduino-synths with two controllable oscillators, a volume pot and tempo control. Unfortunately the breadboards we had to try and build them on were very small, which didn’t help teaching how to build the circuit. Since then, I’ve made a simpler design with more robust code, and changed the circuit diagram to match the tiny breadboards, which should make it a great deal easier to understand for others.


Pictures are included above, and a sound sample/source code below. The synth itself is relatively inaccurate, but generates a sufficient amount of noise to have a lot of fun with!
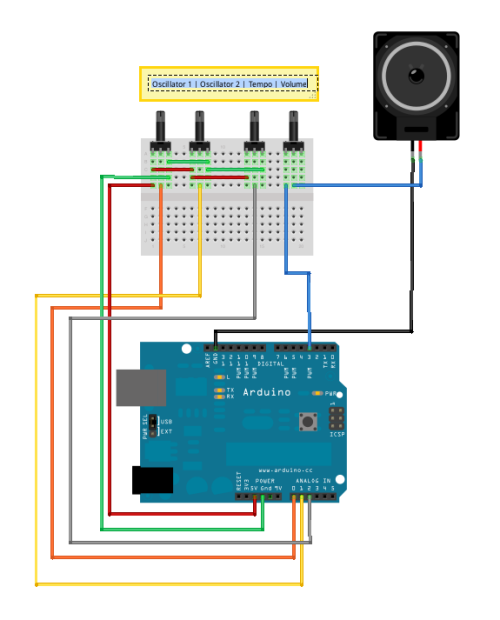
Circuit diagram (drawn in Fritzing)
/*
  6: Simple Two-Step Sequencer

 This project combines pretty much everything from the previous tutorials.
 It involves two oscillators, a status led, and tempo and volume pots.

 */

int speakerPin = 3;      //connect speaker to pin 3
int ledPin = 11;         //we'll use this pin for our status led
int oscillator1Pin = 0;  //we can set frequency for first step here...
int oscillator2Pin = 1;  //... and frequency for step 2 on this pin
int tempoPin = 2;        //read tempo pot here

/*
  The pinState variable checks if we are outputting a sound.
 By default we can set it to LOW - meaning "off".
 */
int pinState = LOW;

long previousMicros;     //count microSeconds to control frequency
int frequency;           //variable to set frequency

long previousMillis;     //count milliSeconds to control tempo
int tempo = 120;         //default tempo is 120BPM

void setup(){
  Serial.begin(9600);
  pinMode(speakerPin, OUTPUT);
}

void loop(){

  //read from our analog pins and set our frequency limits
  float oscillator1 = analogRead(oscillator1Pin);
  oscillator1 = map(oscillator1, 0, 1023, 200, 2000);

  float oscillator2 = analogRead(oscillator2Pin);
  oscillator2 = map(oscillator2, 0, 1023, 200, 2000);

  //read and set tempo limits
  float tempo = analogRead(tempoPin);
  tempo = map(tempo, 0, 1023, 60, 1000);

  //algorithm to convert tempo into BPM
  float interval = (1000/tempo)*60;

  /*
  We can't use the delay function in this case,
   as it will freeze the sketch and disrupt the
   oscillators.
   Instead we use a method that counts milliSeconds,
   compares it to our BPM, and switches between which
   oscillator should be in use.
   */

  //oscillator1
  if(millis()-previousMillis > interval/2){
    playTone(speakerPin, oscillator1, interval/2);
    analogWrite(ledPin, LOW);
  }
  //oscillator 2
  if(millis()-previousMillis < interval/2){
    playTone(speakerPin, oscillator2, interval/2);
    analogWrite(ledPin, tempo/4);
  }
  //One cycle completed: reset our counter!
  if(millis()-previousMillis > interval){
    previousMillis = millis();
  }
}

/*
  We use the same method here as above to
 switch our outputPin on and off without having
 to use delay() and thus keep everything running
 smoothly.
 */

void playTone(int outputPin, int frequency, float tempo){

//this bit is new - it makes sure we're calculating the note's frequency correctly
  float hperiod = (500000 / frequency) -7;
  long cycles = ((frequency*tempo)/1000);
  for(long i=0; i<=cycles; i++){
  //we use frequency/2 because one LOW + one HIGH = one whole cycle
    if(micros() - previousMicros > frequency/2){
      previousMicros = micros();
      if(pinState == LOW){
        pinState = HIGH; //if the pin is already LOW, set it to HIGH
      }
      else{
        pinState = LOW;  //otherwise if it's HIGH, set it to LOW
      }
      digitalWrite(outputPin, pinState); //Write pinState to specified pin
    }
  }
}
Filed under: Documentation, Experiments, Talks | Leave a Comment
Tags: arduino, ckc, patching zone, workshops, zoutermeer
~~~~~~~~~~~~~~~~~~~~~~~~~~

The content of this blog is licensed under a Creative Commons Attribution-ShareAlike 3.0 Unported License.

No Responses Yet to “Workshop: Basic Arduino Square-Wave Synth”